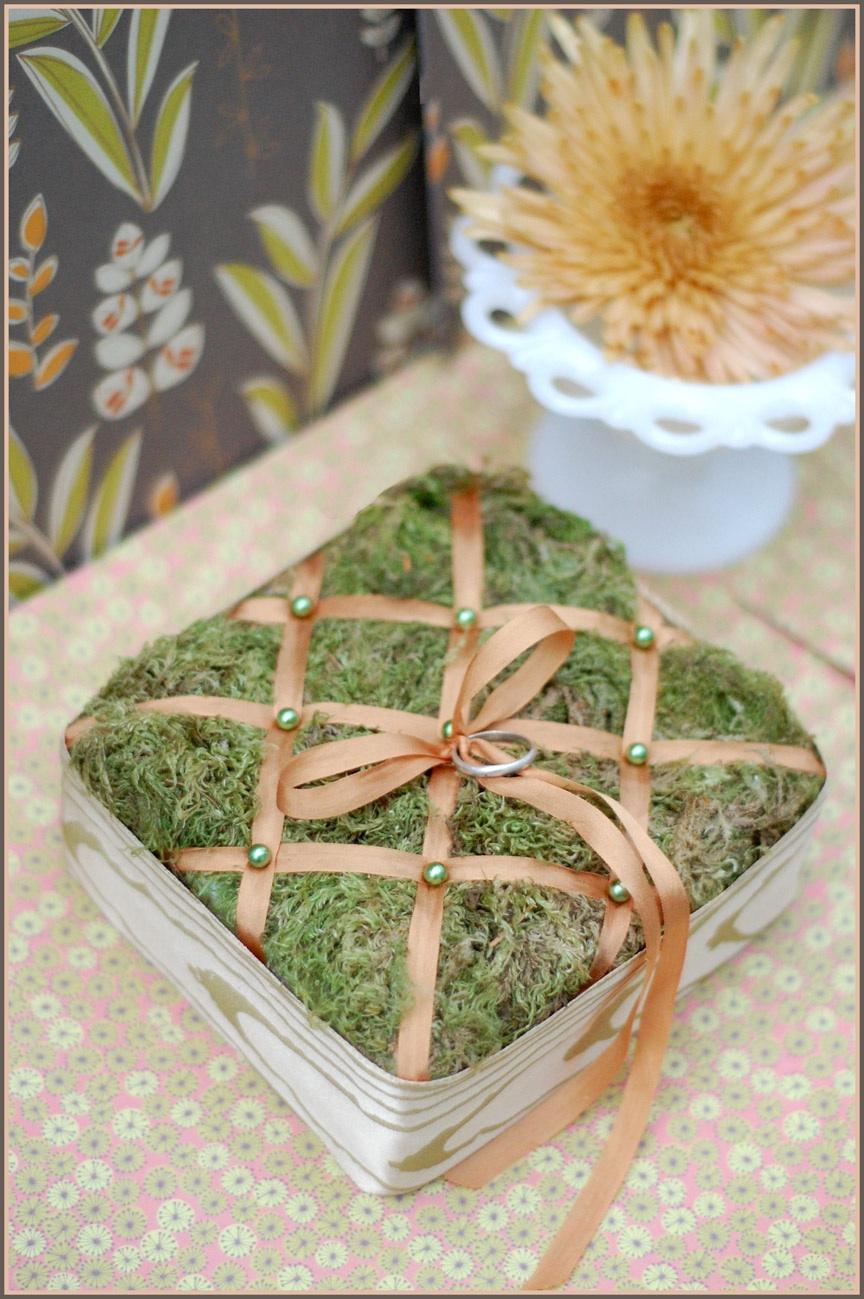
It’s DIY Thursday at Teapots and I came across the cutest idea for your ring pillow –especially if you are having a rustic inspired wedding. Wedding pillows are so costly these days (I have never really understood why) and this one is so adorable and easy to make.
 What you'll need:
- A 13cm x 13cm X 3cm piece of Styrofoam
- 70cm fabric ribbon (3cm wide)
- 3 metres fabric ribbon (less than 1cm wide)
- A 15cm x 15cm scrap of fabric
- A handful of sphagnum moss
- Straight pins
- Round-headed pins
- A pair of scissors
You can get the ribbons from
Moi Decor, and the rest of the items from
Flowerspot. You may need to find your pins from a haberdashery shop though.
 Instructions
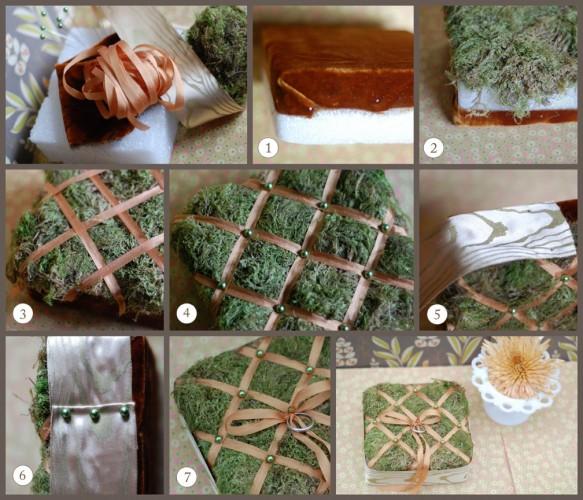
1. Centre your fabric face up on the Styrofoam square and fold the scrap fabric
edges over sides of the Styrofoam and secure with straight pins. Wrap
the corners neatly and pin. (see figure 1)
2. Turn your Styrofoam over so the fabric side is down. Take your
sphagnum moss and stretch it out across the top of the Styrofoam. Be sure
that the moss completely covers the surface. (see figure 2)
3. Cut a length of the skinnier ribbon and run it diagonally across the
mossed surface. Attach both ends of the ribbons on the sides of the
Styrofoam using straight pins. Repeat this process to create a diagonal
grid of ribbon on the top of the pillow.
4. Take your round-headed pins and stick them into the points where the
ribbons intersect on the pillow top. (see figure 4)
5. Turn the pillow on its side and pin the end of the wider ribbon in
the centre of the side, using your straight pins. (see figure 5)
6. Wrap the ribbon around all four sides, concealing the fabric edges and
skinny ribbon tails. Pull it tightly as you go and keep the ribbon edges
lined up with the edges of the pillow. (see figure 5)
7. When you pass your starting point, fold under the ribbon tail and pin
it down using your round-headed pins. (see figure 6)
8. Trim off any loose moss bits.
9. Cut a 30cm piece of the skinnier ribbon and tie it to the round-headed pin
in the centre of the pillow. Attach your rings by tying a bow. (see
figure 7)
This DIY project was created by
Laurie CinottoPhoto credits: {
www.lalalaurie.com}


